
Adelaide Oval is not just one of Australia’s most beautiful sporting arenas—it’s also one of the most strategically nuanced. From cricket to Australian Rules Football (AFL), the venue’s dimensions play a critical role in shaping gameplay. Whether you’re a cricketer adjusting to boundary placements or a curious fan wondering how far a six really needs to travel here, understanding the boundary length at Adelaide Oval opens the door to deeper insights.
In this guide, we’ll explore:
- The boundary dimensions at Adelaide Oval
- How its oval shape affects play
- Comparisons with other stadiums
- How boundary sizes influence cricket and AFL
- Tactical implications for players and teams
Official Boundary Dimensions
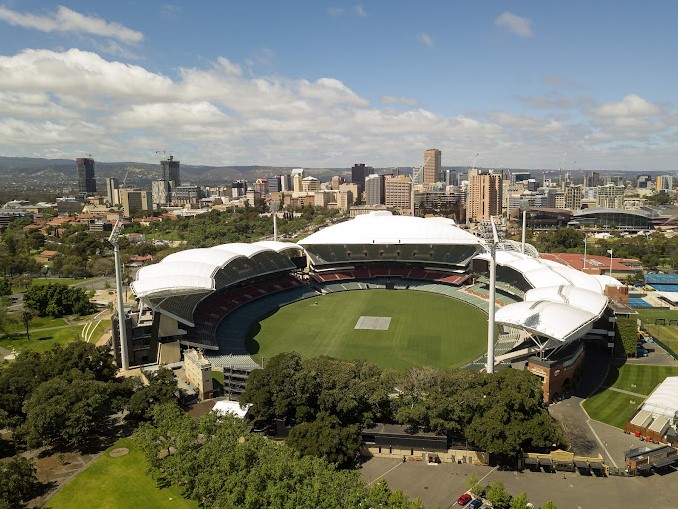
Unlike rectangular fields or symmetrical arenas, Adelaide Oval has an elliptical playing surface. This makes its boundary lengths irregular—longer straight down the pitch and shorter square of the wicket.
| Boundary Area | Approximate Distance (Meters) |
|---|---|
| Straight (Down the Pitch) | 83–85 m |
| Square Boundaries (Off-side & Leg-side) | 63–70 m |
| Behind the Wicket (Fine Leg/Third Man) | 60–65 m |
These distances are approximate and can vary slightly depending on pitch placement and event-specific ground markings.
Layout: Why the Shape Matters
Adelaide Oval’s oval geometry offers both challenges and opportunities. Unlike grounds with a more symmetrical outfield, its variable boundary sizes mean:
- Batters can exploit short square boundaries for pull and cut shots.
- Bowlers, particularly spinners and pacers with strong control, might try to angle deliveries to force batters to hit to the longer boundaries.
- Fielders need better positioning awareness because certain pockets of the field are more attack-prone.
In Cricket: How Boundary Size Affects Gameplay
1. Batting Strategy
Batsmen often prefer to target the square boundaries for risk-free boundaries. On the other hand, hitting straight sixes requires more power and precision due to the 80m+ distance.
| Shot Type | Effectiveness at Adelaide Oval |
|---|---|
| Pull/Cut | Highly effective |
| Lofted Drives | Riskier due to long boundaries |
| Sweep Shots | Moderate (dependent on pitch) |
2. Bowling Strategy
Bowlers can benefit from the large straight boundaries by encouraging batters to hit down the ground, especially when fielders are placed deep. Spinners may use flight to tempt aggressive shots to the longer parts.
3. Fielding Considerations
Fielders at long-on and long-off must cover more distance, so quick positioning and communication become essential. Short square boundaries require precise placement to cut off boundaries quickly.
In AFL: The Boundary’s Role in Football
Adelaide Oval is also a home ground for two AFL teams: the Adelaide Crows and Port Adelaide Power. In football, the dimensions affect play differently:
| Feature | Impact on AFL Gameplay |
|---|---|
| Wide Wings | Encourages spread and lateral ball movement |
| Long Goalsquares | Tests kicking strength and endurance |
| Curved Ends | Challenges set-shot goal accuracy |
The oval shape, combined with grandstand design and turf quality, supports open-style football, which many players and coaches favor.
Comparison with Other Grounds
Let’s compare Adelaide Oval’s boundary size with other prominent cricket stadiums in Australia.
| Stadium | Straight Boundary | Square Boundary | Shape |
|---|---|---|---|
| Adelaide Oval | 83–85 m | 63–70 m | Oval |
| MCG (Melbourne) | 75–78 m | 80–86 m | Round |
| SCG (Sydney) | 60–65 m | 65–75 m | Asymmetrical |
| Gabba (Brisbane) | 70–80 m | 70–77 m | Circular |
Key Takeaway: Adelaide’s long straight boundaries stand out compared to the shorter straights at the SCG and even the Gabba.
Psychological and Tactical Implications
For Batters:
- Adelaide Oval forces batsmen to think before swinging—especially when attempting lofted drives.
- It’s a favorable ground for square-of-the-wicket players, such as those who dominate with cuts and sweeps.
For Bowlers:
- Pace bowlers may benefit by bowling fuller to use the long straight field.
- Spinners often thrive later in the match due to the dry surface and the risk involved in going over the top.
For Captains:
- Smart captains adjust boundary-side fielding placements over-by-over.
- Defensive strategies work better here, especially in the longer formats, where run containment is key.
Historical Games That Showcased Boundary Impact
| Match | Outcome Highlight |
|---|---|
| Australia vs India, 2014 (Test) | Virat Kohli’s century featured elegant square shots |
| Big Bash Final, 2017 | Multiple sixes to short square leg thrilled crowd |
| Warner’s 335* vs Pakistan, 2019 | Use of full ground width and placement was evident |
Diagram (Descriptive)
If you imagine standing at the batting crease in Adelaide Oval:
- The straight boundaries toward the scoreboard and cathedral end stretch farther.
- To your left and right, the boundaries are noticeably closer.
- Deep third man and fine leg are curved in, requiring more precise placement.
A visual diagram would show an egg-shaped field with a slightly elongated north-south axis.
Practical Info for Fans & Visitors
Want to know where to sit for sixes?
- Square boundaries near the Western Stand or Eastern Terrace are prime areas to catch a ball.
- Northern Hill is great for viewing straight shots and offers a classic cricket vibe.
For amateur cricketers using Adelaide Oval:
- Respect the boundary flags—they can move slightly for different events.
- Know your power zones and aim for high-percentage zones (typically square for casual players).
Adelaide Oval’s boundary length is more than a number—it’s a strategic factor that influences cricket matches and AFL games alike. With long straight boundaries and shorter square ones, it presents challenges that test skill, decision-making, and game awareness.
Whether you’re a batter eyeing the gaps, a bowler planning your lengths, or a fan curious about ground dynamics, the boundary layout at Adelaide Oval is central to understanding the drama and beauty of the games played here.